How Do I…?
Get started with Canvas ⮟
Communicate with students ⮟
Organize and view my course ⮟
Assess and grade student work ⮟
Find Even More Resources ⮟
Finding your Courses
Not all of your courses will appear in your Dashboard. Usually published courses appear on the dashboard after the course start date, but there are scenarios that may prevent this from happening automatically. To find all of your course enrollments navigate to the Courses (sidebar on left) > All Courses. You will then be redirected your “My Courses” page where it will provide a list of Past and Future Enrollments.
Please note: My courses will also indicate if your courses are Published or Unpublished.
In the All Courses section, you can customize your course list by marking courses as “Favorites.” Favorites will then be displayed in your Canvas Dashboard. Note that the Dashboard will only display 20 course cards at a time.
For further details, visit: How do I customize my Courses list as an instructor?
Course Availability
Students can only participate in a course between the course’s start and end dates. “Participation” includes receiving announcements or completing assignments, discussions, quizzes, etc. These dates are set by the Registrar but can be changed by the instructor in the course settings if needed. From the Settings page, change the Participation drop-down to Course and revise the date(s) as needed.
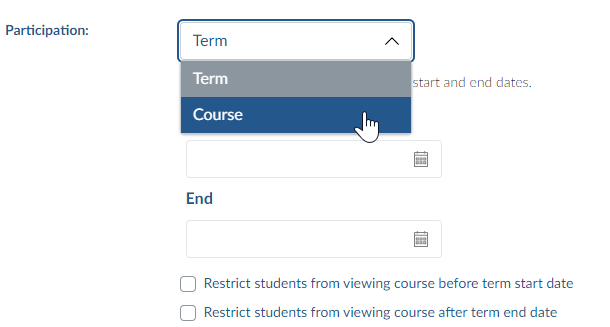
Do not leave these fields blank as this changes the Dashboard behavior for students!
Do not check the restriction boxes underneath these dates. These checkboxes override read-only access for published courses and should not be changed.
For further details, visit: https://community.canvaslms.com/t5/Instructor-Guide/How-do-I-change-the-start-and-end-dates-for-a-course/ta-p/452354
Publish my course (make available to students)
Only published courses can be seen by students. Courses are unpublished when created, so faculty must take this step to allow student access. Courses can also be unpublished up until there is a graded submission.
Course > Home > Publish (available in sidebar on the right)
For more details, visit How do I publish a course?.
Note that once a course is published, instructors can still hide specific content from students until you wish for that content to be seen. Each module and each item in your course has a green/gray indicator next to it. If the indicator is a green cloud with a checkmark, that item is published and available to students. If the indicator is a gray cloud, the item is unpublished and hidden from student view. Click here to see more on this topic.
Send an announcement
Announcements are sent to students through their notification preferences, which can be received as email, text, or a Canvas inbox message. They are also saved to Canvas in the Announcements area of each course, which acts similarly to a discussion forum. Students can access all course announcement posts from this area. *Note that pictures in Announcements can only be seen from the Canvas course and are not included in the notification.
Course > Announcements > +Announcement
Note: The course must be published and between the course start and end dates for students to receive announcement notifications. To send announcements or allow students to participate in any activities before the course start date, go to settings and change the Participation settings to “Course” and edit the start date listed there. Do not leave these dates blank as this changes the Dashboard behavior for students!
For more details, visit How do I add an announcement in a course?
Add a Teams Meeting Link
Instructors can use the Rich Content Editor toolbar in Canvas to create a Teams meeting link for students without having to copy/paste or send invitations. Meeting links don’t expire, so you can create one meeting event and reuse it all semester if you’d prefer. Reusing meeting links also keeps a running chat in Teams throughout the meeting series. If you want the chat window to refresh for every meeting, you’ll want to create a new meeting link for each new session.
[
Click to download a PDF version of these instructions.]
Create the Meeting Link and Set Meeting Options:
-
-
- Navigate to a place in your course where you want the meeting link to appear and where you can add/edit text. Meetings can be added to a Page, Announcement, Course Calendar Event*, Discussion, Assignment, Classic Quiz*, etc., using the Rich Content Editor toolbar.
If adding a course calendar event, select the correct course calendar and then click the MORE OPTIONS button at the bottom of the Add Event window before proceeding with the instructions below.
- Click the plug-shaped Apps icon.

- The Select Apps window will appear. Click on Microsoft Teams Meeting. (The first time you use this feature, you will need to choose All Apps and then select Microsoft Teams Meeting from the list of options.)
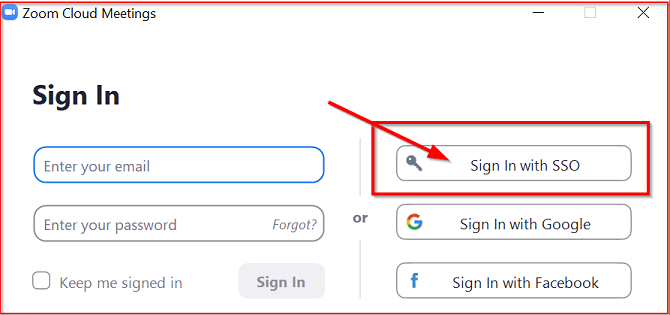
- You may be prompted to SIGN IN first. The next step is to click CREATE MEETING LINK.
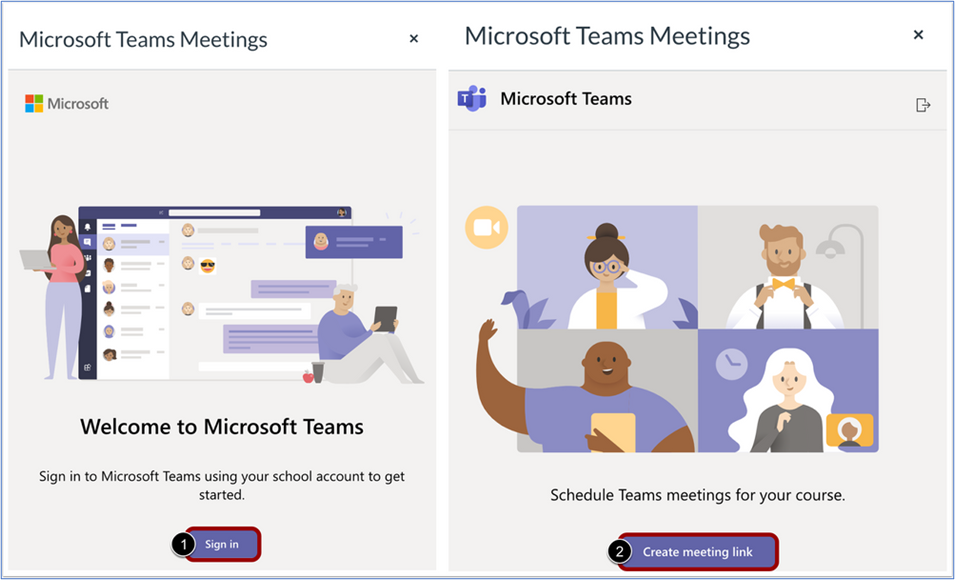
- Fill out the meeting details and select CREATE.
TIP: Meeting start and stop times are optional and not enforced; therefore, a good practice is to include the class name and meeting time in the title. For example, “ART 101 Thursdays 3-4pm” or “CHEM 202 Special Lecture 2/15 10-11:30am”
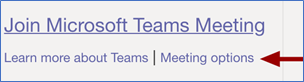
- SET MEETING OPTIONS (Optional): Click the Meeting Options link at the bottom of the window to adjust meeting settings and permissions. Changes are saved automatically, so you can close this browser window when you are finished. You cannot change meeting options after this step!*
- Click COPY at the bottom of the window. The meeting details will appear in the text box area. Save changes in your Canvas screen when ready.
- Make sure your content is published for students to view. When it’s time for your meeting, you and your students can use the “Join Microsoft Teams Meeting” link to join your scheduled session.
-
NOTES:
-
-
-
- Team recordings must be shared manually.
- This method does not update your Outlook calendar.
- You can edit the meeting title and other details later, but not the meeting options. To reset meeting options, you will need to delete the original text and replace it by creating a new Teams meeting.*
- Course Calendar events have the added benefit of allowing you to “duplicate” the meeting link for recurring class times. Ignore the option to add a BigBlueButton (this will add a completely different meeting to your event).
- The Teams Meetings button will only display for events created in course calendars. Personal calendars are not supported.*
- The Teams Meetings button will not display in the Rich Content Editor for New Quizzes.*
Edit profile and notification settings
Your profile can be edited in many ways to share information about yourself and establish ways to contact you through Canvas. Canvas notifications can also be customized to your specifications.
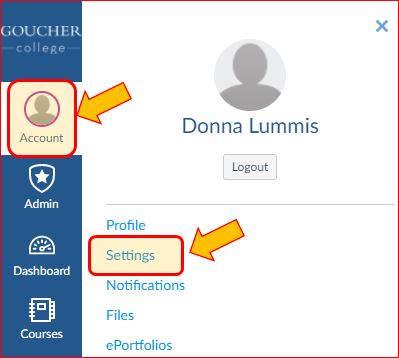
Click Account icon on the navigation panel > Choose “Settings” or “Notifications”
From Settings, you can …
* Change your profile picture by clicking on the image already there.
* Add a personal email or get text notifications sent to your phone using “Ways to Contact” on the right.
* Note: Visit Display Names and Pronouns for information about changing your display name in Canvas and other systems.
For more information visit: How do I set my Canvas notification preferences as an instructor?
Send an email to one or more students
Canvas does not technically have built-in email. It has a messaging system tied to users’ notification preferences. This messaging system is called “Conversations” by Canvas. By default, messages (or “conversations”) are sent to the assigned Goucher email address. Messages will not be sent through email if the course is not yet published, is outside the start or end date in the course settings, or if the user has turned off this setting.
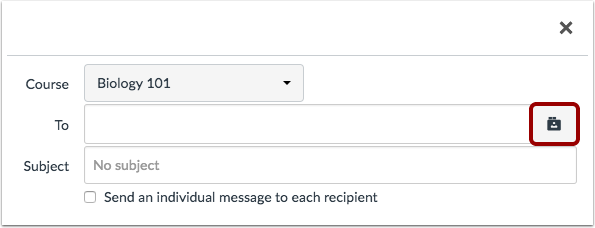
Click Inbox icon on navigation panel > Compose New Message icon > Select a course > Open Address Book > Select recipients by role or individually > Finish and Send
Compose message icon:

Address Book icon (course must be published for students to be listed):
For more details, visit How do I send a message to a user in a course in the Inbox?
NOTE ABOUT ATTACHMENTS – Attachments are included in email messages sent FROM Canvas, but not the other way around. If sending an attachment, use the Canvas Inbox rather than replying to a Canvas message from regular email.
Add other participants to a course (TA, Guest, or Observer)
Students and teachers are enrolled into Canvas courses automatically through the Registrar’s Office. Enrollment changes made in MyGoucher should be reflected in Canvas within 12 hours. NOTE: Students auditing a course must go through the Registrar’s Office.
Instructors can add additional users* from the PEOPLE page to their currently running course(s) using the following roles:
- TA – Teaching Assistants (TAs) have most of the same permissions as instructors including grading
- Designer – Course designers can assist with content but not grading
- Observer – Observers can view published content only (not grades or users)
Course > People> +People>Add using full-name email address
*Note: Email addresses are available to instructors through the Goucher College Directory
From the People page, click the +PEOPLE button, and using the Email Address option (1) enter the new participant’s full-name Goucher email address. If entering multiple people, separate the email addresses with commas (2).
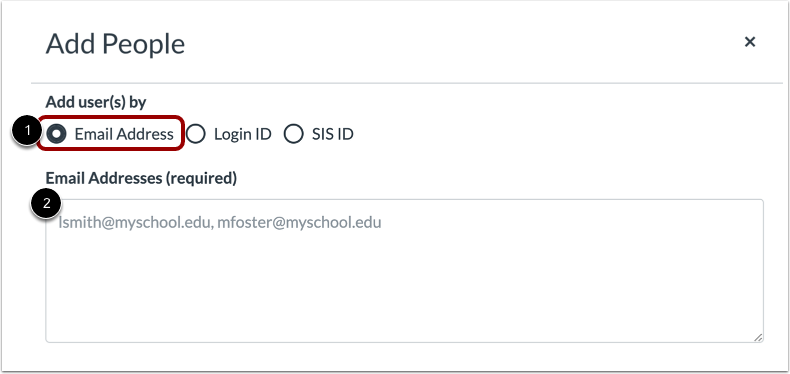
Click NEXT to confirm the correct users were found and are correct. Select BACK if any of the users were not found and/or a correction needs to be made. To confirm additions, click ADD USERS.
*Users must already exist in our Canvas site to be added to a course. Current teachers, students, and staff have accounts created automatically. Any follow-up questions regarding enrollment should be directed to helpdesk@goucher.edu.
For more details, visit the Canvas Guide “How do I add users to a course? ”
View my course as a student
When an instructor views a course as a student, a unique Test Student is added to the course. This Test Student will appear in the grade book, allowing instructors to test everything including grades. Teachers can also reset the Test Student account, erasing all recorded submissions to start over from scratch.
Course > Settings > Student view (from panel on right)
Use the colored panel that now appears at the bottom of the screen to reset the Test Student account or return to your normal view.

For more details, visit How do I view a course as a test student using Student View?.
View inactive students in my course
Students who officially drop or withdraw from a course will no longer be deleted from the course. Instead, they will appear on the People page as “inactive”. Students who appear as inactive will not have access to the course any longer, but their progress and activities will remain visible to teachers and administrators.
Inactive students will appear on the People page by default. If desired, inactive students can be hidden from the People page by changing the “Role” dropdown at the top to “Student”.
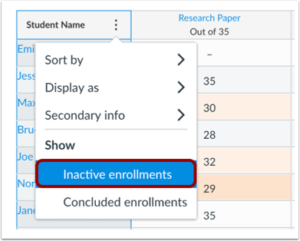
Alternatively, inactive students are hidden in the Gradebook by default. To see grades for inactive students, click the More button (3 dots) at the top of the Student Name column and choose “Show Inactive enrollments” .
For more details, visit How do I view grades for inactive/concluded student enrollments in the Gradebook?
Cross-list multiple course section enrollments together
Use these instructions to combine enrollment from multiple courses into one. Instructors can only cross-list their own courses. Please contact helpdesk@goucher.edu if you need to cross-list courses assigned to multiple instructors.
For example, let’s say you are teaching multiple sections of MAT222 this semester and you want all your sections to share a single course in Canvas. First, choose one section to be the Parent – the one that holds all the materials. The other sections become Child courses, meaning their enrollment is redirected or “pushed” to a Parent course.
- Copy or write down the full Goucher course code for the Parent course (the one you will use to hold all enrollments). You can find this code by going to the Canvas Course Settings and looking at the SIS ID found there. For example, MAT222.001.25FA is a valid course code.
- Navigate in Canvas to a Child course (one that should be linked to the Parent).
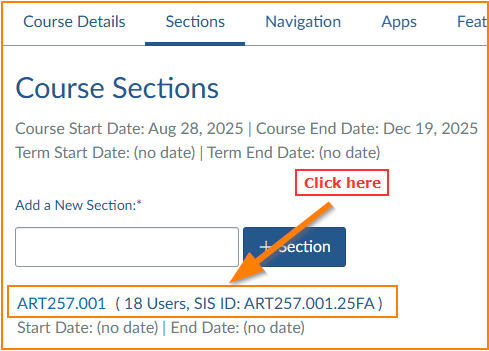
- Go to Settings > Sections tab > Click on the blue link to the section listed there
(DON’T SKIP THIS STEP).

- Select the Cross-List This Section button from the top right.
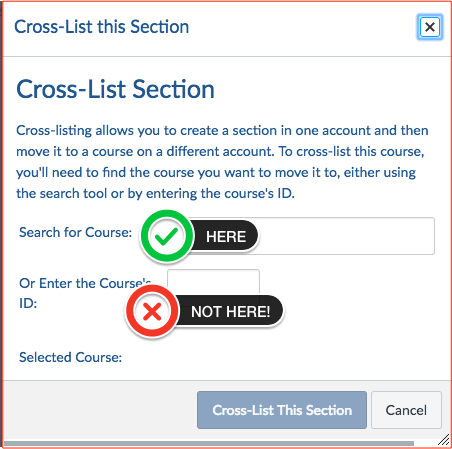
- Paste or type the Parent course code into the first search box. Don’t use the 2nd box because that’s a different course ID field.
- Select Cross-List This Section button.
- Repeat steps 2-5 for any additional sections to be added to the Parent course.
You can confirm all combined sections by going to the Parent course > Settings > Sections.
For more details, including information on re-cross-listing and de-cross-listing, visit How do I cross-list a section in a course as an instructor?
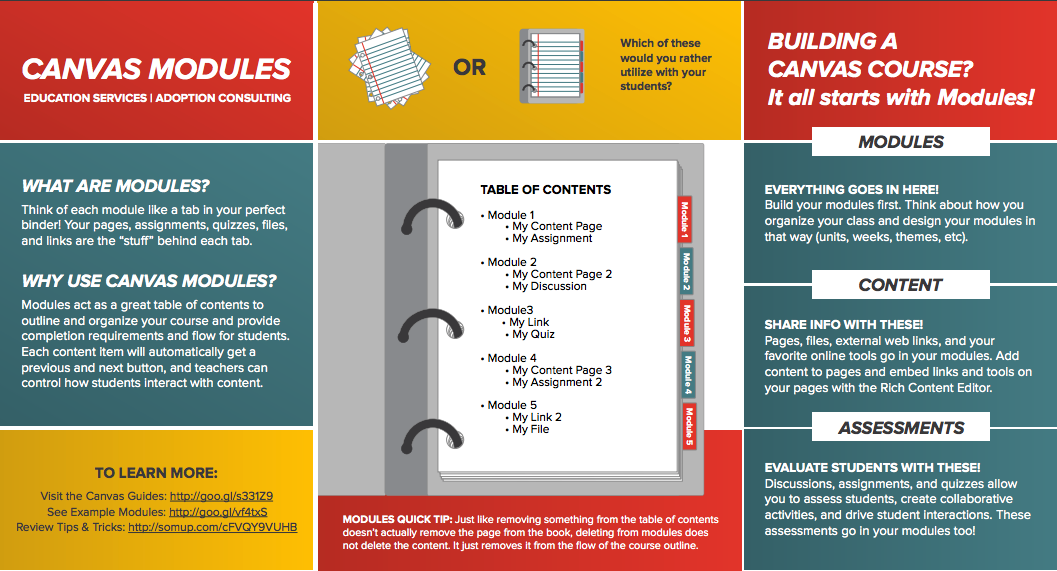
Organize content into Modules
Modules organize different types of content into sub-sets of materials or activities. Modules can be organized based on weeks or subjects.
For more details, visit How do I add a Module?
Change the Course Navigation
Instructors can customize the course navigation panel on the left to change what options appear to students. This is highly recommended as a way to reduce confusion for your students by only displaying items they need. For example, you can display MODULES to show organized content but hide repetitive options such as ASSIGNMENTS, FILES, PAGES, etc. Items hidden from students appear grayed-out to instructors.
Note: Even after following the steps below, some navigation items will not become visible until they have at least some content in them.
Go to Course > Settings > Navigation
Either drag items between the top (visible) and bottom (hidden) lists, or click the gear icon next to an item and select the appropriate option.
For more details, visit How do I manage Course Navigation links?.
Import Content from Another Canvas Course
Teachers can copy content from one course to another, such as from last semester to the next.
Go to Course without content > Import Existing Content (sidebar) > Choose existing course > Choose “Select Specific Content” (Recommended) > IMPORT > Hit SELECT CONTENT and do not choose “Course Settings”
- Go to the current Canvas course – the one that needs the new content.
- On the right, choose the IMPORT EXISTING CONTENT button.
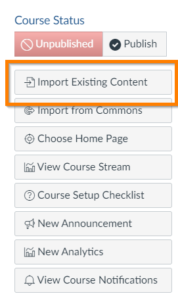
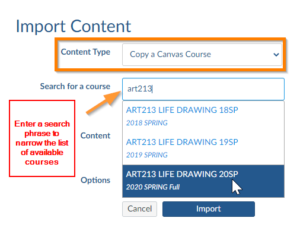
- Choose “Copy a Canvas Course” as the content type.
Type in the name of your old course in “Search for a course.” TIP! – You can also enter the beginning of a course code in the search field, such as “bio101”, or the full course ID (such as ART101.002.25FA), and then choose the course name that appears.
- Under Content choose “Select specific content“*
*This is the recommended option. Selecting Specific Content in Step #7 below let’s you choose to skip categories of information rather than specific items. For example, you can choose to skip Assignments, but you can’t choose to skip a specific assignment. It is recommended that you do not copy “Course Settings” from a prior semester.
- Skip date adjustments – If students are enrolled before course content is imported with due dates, students may not be able to submit work to those imported assignments.
- Click the IMPORT button.
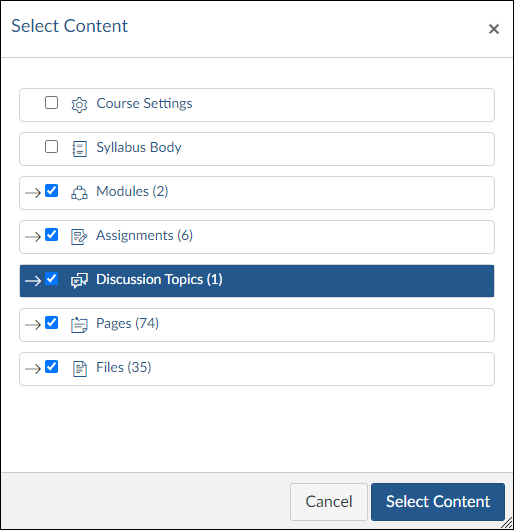
- If you chose to Select Specific Content in Step 4…
(a) Click the SELECT CONTENT button that appears under Current Jobs

(b) Select the types of materials you wish to import and then click the SELECT CONTENT button.

Full instructions are available from Canvas at https://community.canvaslms.com/docs/DOC-12935-415257077
Add a syllabus
Instructors should place syllabus information in their Canvas course using the Syllabus link in the course navigation panel.
Go to Course > Syllabus> Edit
Additional syllabus resources:
Add information (assignment, document, image, link, etc..) to a module
Canvas modules can include many different types of content. You can add items that already exist in your course, or you can create new items directly from the module.
Course > Modules > “+” button
To the right of each module name are buttons for renaming (pencil), adding content (+-sign), and editing (gear). Select the +-sign icon to add a new item to that module. Choose the type of content to be added (assignment, quiz, discussion, etc..).
For items you’ve already created in the course – Existing items will appear for you to select.
For new items that don’t already exist in the course – To add an entirely new item, select the “New” option at the top of the list. For example, if Assignments is selected, choose “New Assignment”.
Note: Check the published status of any items you add to modules, especially those items you want to stay hidden.
For more details, visit How do I add course content as module items?
View a course after its end date
Courses that have ended will no longer appear on the Dashboard. You can find them by going to COURSES > ALL COURSES on the navigation panel.
Note: This is expected behavior for student Dashboards. Please do not extend course dates unnecessarily or leave them blank. Students do complain when their Dashboards do not work as planned.
Add a file, link, or image
Method One: Files on the navigation panel
This area allows you to upload files and easily organize your files using folders. You can drag and drop files into your folders to keep your content organized.
Go to Course > Files > Upload or +Folder
Method Two: The Text Editor
The Text Editor is available in most areas where you would upload content (pages, discussions, assignments, etc.). The editing toolbar has icons for creating web links (1), or links to images, media, and files (3). These buttons further allow you to choose an existing course item or to upload new content. These options are also available from the Insert menu above the toolbar.
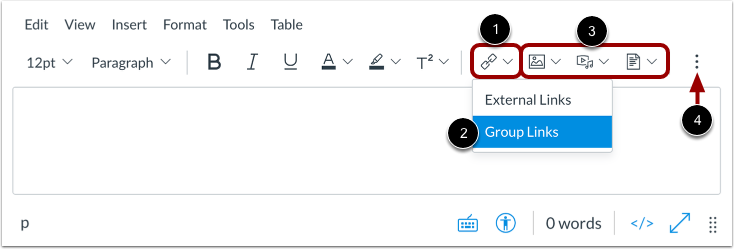
Course > Edit a page, assignment, discussion, etc.. > Select the desired icon (Link, Images, Media, or Documents)
For more details, visit How do I insert links to course content into the Rich Content Editor using the Content Selector as an instructor?.
Create a Page
Instructors have the capability to create a page where they can add text, links, files, images and embedded videos in their Canvas courses similar to a web-page. A page in Canvas can be used to organize small areas of the course which then can be added to a related module. Pages are not separate files, therefore instructors will have access to edit their pages throughout their semesters. You can also set one of your pages to be your Course Home Page (see below for further instructions).
Course > Page > + Add Page
Use the Accessibility Checker
The Rich Content Editor includes an accessibility tool that detects common accessibility errors within the editor. You can use the Accessibility Checker to design course content while considering accessibility attributes. This tool only verifies content created within the Rich Content Editor.
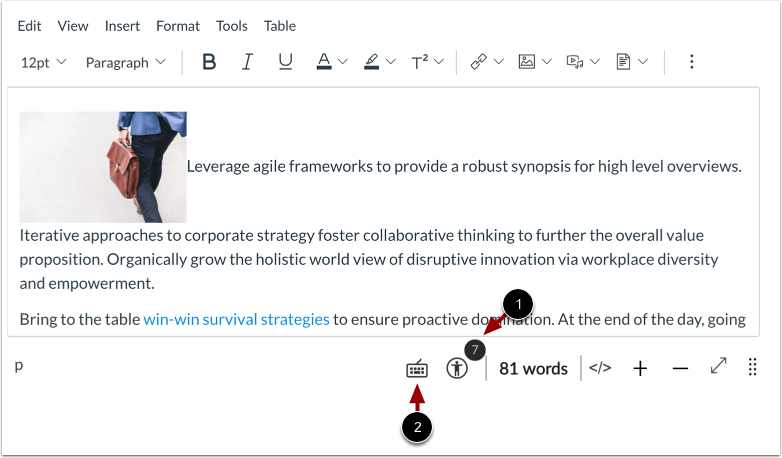
If any accessibility issues are detected within the Rich Content Editor, the Accessibility Checker displays an indicator [1]. To view accessibility issues, click the Accessibility Checker icon [2].
For more details, visit How do I use the Accessibility Checker in the Rich Content Editor?
Upload or Record Videos with Canvas Studio
Canvas Studio is video sharing tool designed by the creators of Canvas. Instructors and students can share comments on a timeline for any video uploaded to Canvas Studio – from YouTube or any other source – making Canvas Studio an interactive tool within a course. Canvas analytics are also available to instructors for videos shared through Canvas Studio.
Step 1: Add a video to your library
Select Canvas Studio from the main navigation panel > Optional: Choose a course from the menu (3-lines) icon at the top left > Click the Add or Record button.
Step 2: Share a video with students in a course
Edit an assignment, a page, a discussion, etc. and select the Canvas Studio tool from the toolbar.
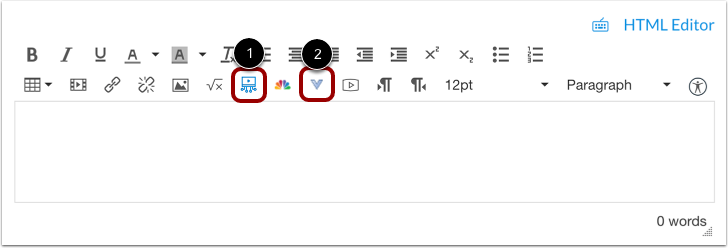
If the Studio icon (1) is not visible, select the More icon (2) first to choose Studio from a list.
For further instructions, visit our Studio Resource page.
Add a link to a library resource
- Go to the library resource you want to use and find the Permalink (usually found by clicking the text PERMALINK, SHARE, or EMBED depending on the page). Copy it to your clipboard.
- Go into your Canvas course and go to Modules.
- Click the gray “+” icon to add an item. (Click the “+Module” icon if you need a new module first.)
- From the dropdown, select “Add External Url”
- Paste the Permalink in the “URL” box and click Add Item.
Special Note: If the Permalink does not include the prefix “https://goucher.idm.oclc.org/login?url=” you will need to add this prefix before the link will work off campus. For example, to link to JSTOR from off campus you would need to change the original url, http://www.jstor.org/action/showAdvancedSearch, to https://goucher.idm.oclc.org/login? url=http://www.jstor.org/action/showAdvancedSearch.
Add an assignment (online or otherwise)
Assignments can have different submission types including:
- Online – can be a text entry, file upload, web link, or media recording
- On Paper – use for anything not submitted online, such as written papers, presentations, performances, etc.
- External Tool – use for special apps such as Atomic Learning training, Campus Pack blogs, wikis, journals, or podcasts, or any special activity app configured for your course.*
Go to Course > Assignments > +Assignment
* When “External Tool” is selected, click on the Find button to select from a list of tools configured in Canvas.
Other types of activities can also be considered assignments and graded, such as discussions or quizzes, and these can be added from their respective areas on the navigation panel. Graded activities can also be added directly from the Modules area.
TIP: To create a reflective journal, use these instructions to create an online assignment set to “Text”. Canvas allows students an unlimited number of submissions for teachers to see and grade, but only the grade given to the most recent submission is recorded in the grade book (meaning the grade you give should be cummulative rather than a grade for each individual entry to be added together later).
Add a discussion
Instructors have many ways to customize Discussions in their courses. For example, settings can be changed to make a Discussion graded, anonymous, or used to share files for collaboration or peer review. (Note: To allow students to post and read each others’ papers, you must allow them to attach files to discussions. See instructions for this here: How do I allow students to attach files to a course discussion?)
Go to Course > Discussions> +Discussion
For more details, visit How do I create a discussion as an instructor?
View Discussion Replies
When viewing an active Discussion in your course, a streamlined view of multiple replies to the same post can be displayed either “inline” (click to expand) or in a “split view” (in a side panel).
Inline Replies
-
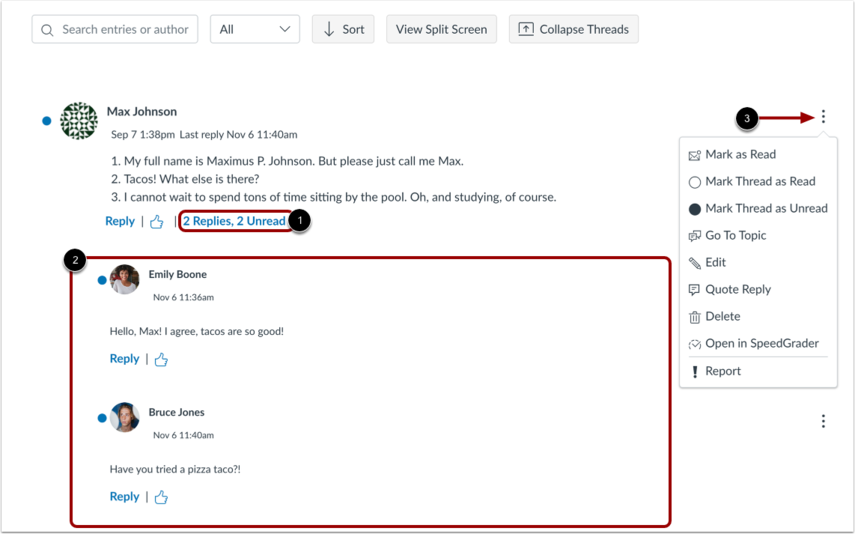
- To expand the discussion thread replies inline, click the # of replies link.
- View the read and unread replies.
- To view threaded replies options, click the Options icon. You can mark replies as read/unread, mark threaded replies as read/unread, return to the topic, edit the reply, delete the reply, open the reply in SpeedGrader, or report the reply.
Split Screen Replies
-
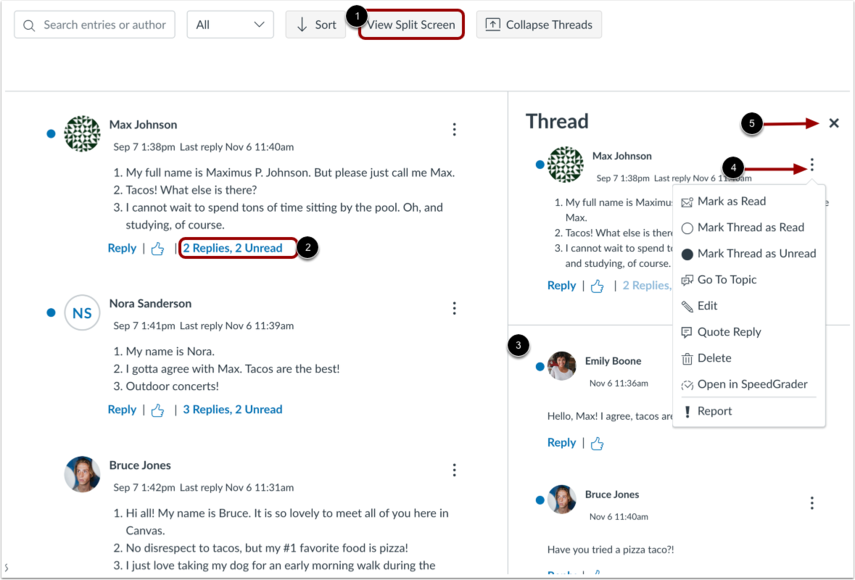
- To view threaded replies in a split screen sidebar, click the View Split Screen button.
- To expand the discussion thread replies sidebar, click the # of replies link.
- View the read and unread replies.
- To view threaded replies options, click the Options icon. You can mark replies as read/unread, mark threaded replies as read/unread, return to the topic, edit the reply, delete the reply, open the reply in SpeedGrader, or report the reply.
- To collapse the discussion thread replies sidebar, click the Close icon. Important! Errors have been reported when switching between different threads without closing this window first.
For even more details, visit How do I view and sort discussion replies as an instructor?
Turn a Discussion into a Podcast
Discussions (above) can also be used to create class podcasts.
Step One: Set-up the Discussion Settings
Create a new discussion using the instructions above with the following settings:
- Enable podcast feed (provides feed for podcast readers)
- In the podcast feed options that appear, include student replies in podcast feed (keep off if you want the teacher to be the only author)
Step Two: Add Audio or Video to Replies/Posts (for students too)
- Open the discussion and hit REPLY to start a new post.
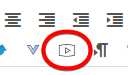
- Click the Record/Upload Media button on the formatting toolbar.
- A recording pane will appear. Use the webcam button (1) to record a video or switch to the microphone button (2) to record just your voice. Follow the security prompts to allow access to these recording devices on your computer.
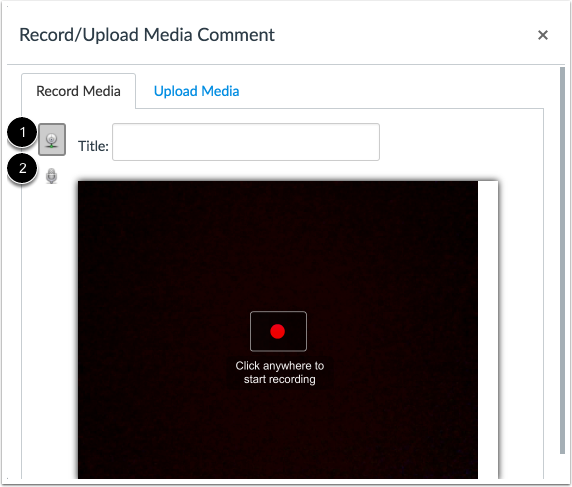
- Follow the visible prompts to start, stop, and save.
For more details, visit How do I enable a podcast feed for a discussion in a course? .
Add a collaboration
A collaboration is a shared document stored on a cloud site, such as an Office 365 document. This is similar to the function of a wiki, but it’s one document instead of multiple web pages.
Go to Course > Collaborations> +Collaboration > Sign in with your account and follow prompts
Note: The sign-in for students and faculty using Office365 is username@goucher.edu. This is not an email address but the format of our Microsoft sign-in.
For more details, visit How do I create a Microsoft Office 365 collaboration as an instructor?.
Want to check student participation in a collaborative project? We recommend using collaborations with Office 365 and using the “Track Changes” tool to see revision history in documents.
Create a wiki (collaborative web pages)
Wikis are web pages edited by multiple people. By default, only teachers are allowed to edit the Pages in their course, but it is easy to change this setting and allow students to edit pages too.
OPTION 1: Change the Permissions On A Page To Allow Students To Edit
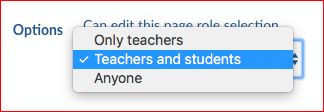
Go to Course > Pages > +Page > Change “Can edit this page role selection” to Teachers and students.
OPTION 2: Set Up Permissions to Allow Students To Create New Pages
Go to Course > Settings > Course Details tab > More options > Change the very last setting so that Teachers and students “can create, rename, and edit course pages by default” > Click the UPDATE COURSE DETAILS button to save your changes
After you set this up, students will see a “+Page” option when they navigate to the Pages area of the course, and they will have the ability to edit pages too.
What if I use other pages for instructions? Will students be able to edit those too?
If you have existing pages before you make the change above, they should remain set so editing can be done by “Only teachers”. Future pages will be set up by default so that editing can be done by “Teachers and students”, but you can change this setting at any time so it’s “Only teachers”.
How do I make the wiki home page open by default when students click PAGES on the navigation panel?
Use the gear icon next to any page and select “Use as frontpage” to make that page the default. In this situation, when you click PAGES, this page will open automatically. A VIEW ALL PAGES button appears at the top of the page to return see a full list of every page. Note: This is not recommended if you have a page set as your course Home page.
How do I review a page’s revision history? This is useful for assessing students’ contributions to a page.
Click the gear icon next to any page and select View Page History.
Overview on how to use Gradebook
To see an excellent overview of how to use the Canvas Gradebook, watch this video tutorial (9min:6sec)
https://community.canvaslms.com/t5/Video-Guide/Gradebook-Overview-Instructors/ta-p/384347
Add a new grade column
Gradebook columns come from graded assignments in the course. The easiest way to add a new column for items that are not submitted online, such as presentations or performances, is to add an assignment with the submission type = “No Submission”.
See “How to add an assignment”
Hide Student Grades While You Work
To hide posted grades until you are ready to release them you will need to choose the “Manually Post Grades” posting policy.
1.Click the Settings Icon….

2. Choose the “Grade Posting Policy” tab and select the manual option.
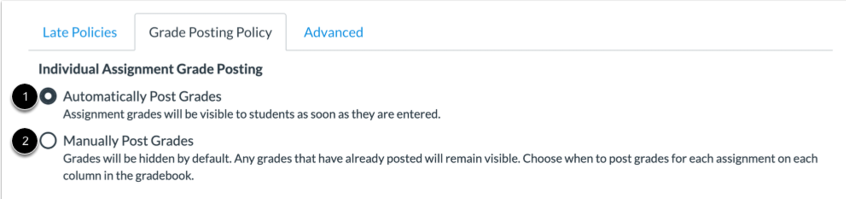
Grades will remain hidden until you manually post them for students to see – How do I post grades for an assignment in the Gradebook?
Create a Quiz
A basic quiz is set up by adding the quiz, filling in the quiz settings, and then adding questions with point values.
Course > Add quiz > fill in Details tab > fill in Questions tab > Publish
There are four types of quizzes:
- Graded quiz (most common),
- Practice quiz (not graded)
- Graded survey (scored for completion, not right or wrong answers)
- Ungraded survey (not graded)
- Surveys can also be anonymous
When adding questions, you can add individual questions each with a point value, or you can create a question group. A question group randomly assigns a subset of questions with the same point value from the group (for example, students answer a random 10 of 15 possible questions each worth 2 points).
Quizzes can be customized in many different ways. To view a detailed list of possibilities, visit Canvas Instructor Guide: Quizzes.
Create a grading rubric
Rubrics can be created and applied to assignments for easy and transparent grading. They can are stored and managed in the Outcomes area, but can also be created directly from an Assignment using the same steps.
Go to course > Outcomes > Manage rubrics (icon with 3 dots on the right) > Add rubric button

- Add a title
- At least one criterion is always listed. Hover over a criterion and click the pencil icon to edit it.
- Click “view longer description” link to add/edit a detailed explanation for students
- For Ratings, move the mouse between “Full marks” and “No marks” until the cursor changes. Click to add more ratings as needed. If needed, hover over a new rating to click on icons for editing or deleting.

- Type in the point value for each criterion.
- Click the Create Rubric button to save.
For more details on creating rubrics, visit How do I add a rubric in a course?.
To add a rubric to an assignment, click the assignment name to open it and select the +Rubric button at the bottom of the screen.
Weight grades
Grades can be weighted based on assignment groups, which work like categories.
Go to course > Assignments > Settings (gear icon) > Check “Weight final grades based on assignment groups > Save
To add groups: Once the setting above is turned on, the Assignments area will have a “+Group” button to add new groups to your grading scheme. For example, you might want groups for quizzes, papers, discussions, etc.
To edit or delete an existing group: Click the gear icon next to the group name to change the name or the group’s assigned weight. (You can also use the gear icon at the top of the Assignments area to review or edit all the group weights in one list at the same time.)
To add an assignment to a group: Click the “+” icon next to a group name to add a new assignment to that group. Or, to change the group for an existing assignment, edit the settings for that assignment.
For more details including how weights are calculated and other considerations, visit How do I weight the final course grade based on assignment groups?.
Use the speed grader
The Speed Grader is a grading view that opens individual student submissions in their own window. Teachers can view the submission, enter a score, provide text or audio comments, and in some cases annotate the submission to provide in-line feedback. Speed grader is available from various places in your course. For example…
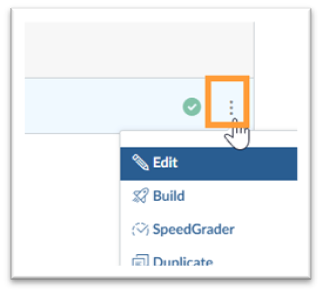
- From a graded area (Assignments, Quizzes, Discussions), select Speedgrader from the MORE button with 3 vertical dots next to the item name.
- From the gradebook, click any assignment cell and click the Grade Detail Tray icon.
Note that speed grader does not work for some external tools.
More information is available from How do I use SpeedGrader?.
Hide or Randomize Student Names While Grading
There are a few ways instructors can change their Canvas screen while grading to limit unintentional bias.
One option is to select the “Graders cannot view student names” checkbox when creating an assignment. This will hide student names from graders when viewing assignment submissions in SpeedGrader. More details can be found at How do I add an assignment that includes anonymous grading?
Another option is to randomize the student sort order in Speedgrader to change which students get graded first or last. Learn more by reading How do I sort the student list in SpeedGrader?
More Resources
Back to top