Logging Into Voicemail (3 options)
By default, voicemail messages are automatically sent to users email inbox as an audio file attachment. Voicemail messages are not saved on our 8×8 VOIP system. However, users can change this and other voicemail settings using the instructions below.
- Dialing into Voicemail using the Calls area in Teams
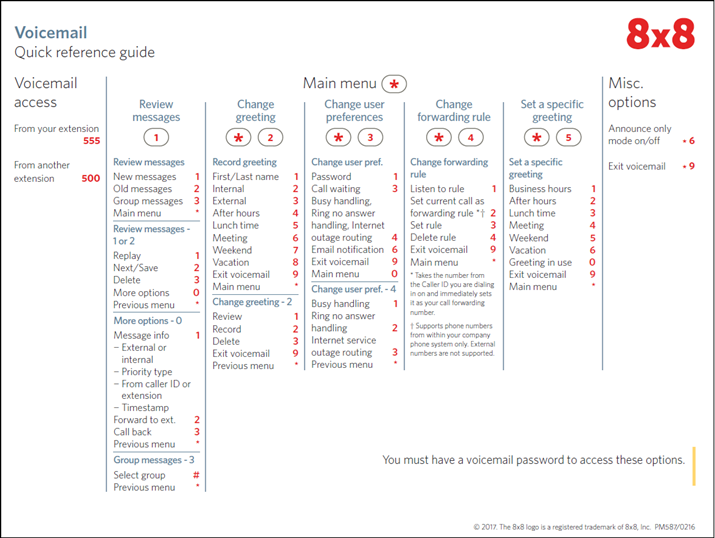
Begin by reviewing the Dialing into Voicemail User Guide on our IT Training Hub. You will find a default PIN information, and steps to create a new PIN, along with the Quick Reference Guide as shown below which includes steps to manage voicemail messages, greetings and preferences. Click any image to enlarge it.
- Logging into the 8×8 Work Website
When accessing voicemail via the web, you will need an 8×8 Password; this is separate from your Goucher password. If you don’t know your password, use the Forgot Password link to reset your password. Note: Changing the voicemail password for a ring group, the password changes for everyone in the ring group.- Go to Work.8×8.com and enter your username@goucher.edu, hit Continue and enter your password.
- Using the 8×8 Work Desktop Software
-
- PC – Install the 8×8 Work for Desktop app from Company Portal
- Mac – Install the 8×8 Work for Desktop app from Self-Service
Managing Voicemail Greetings and Settings via 8×8 Website or Desktop
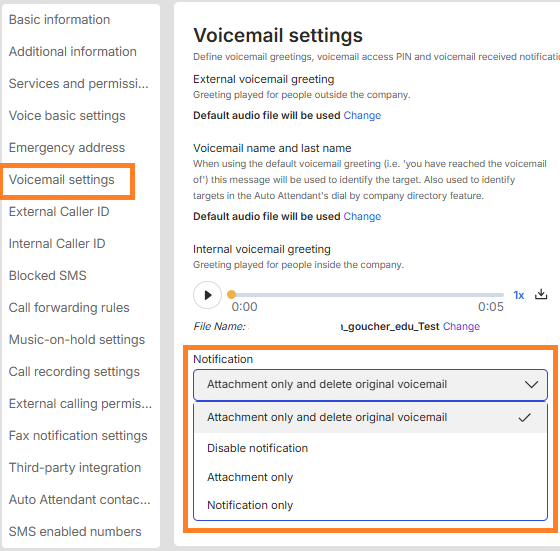
Using the 8×8 Work website (Work.8×8.com) or desktop software you can, record voicemail greetings and manage voicemail settings. Simply open 8×8 Work, then click the Settings icon > Voicemail
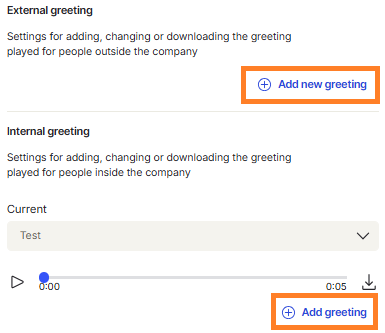
- Voicemail Greetings – Click Add new greeting under the External or Internal greeting area to record a greeting
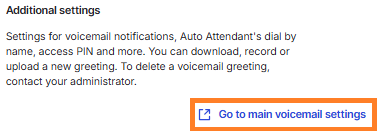
- Voicemail Settings (Notifications and PIN reset) – Click Go to main voicemail settings > Voicemail to access additional voicemail settings
From the Voicemail settings menu you can change the default notification setting that only sends voicemail messages to your email inbox. You can choose disable notification, attachment only or notification only.
You can also reset your voicemail access PIN
![]()
Related content: Phone calls and Department Group Faxing
Contact the Help Desk with any questions or for additional assistance.


