There are two main errors that occur when sending print jobs on a Mac on campus:
- You get a “Hold for Authentication” error
- The printer pauses itself (even after you trying resuming it multiple times)
Hold for Authentication
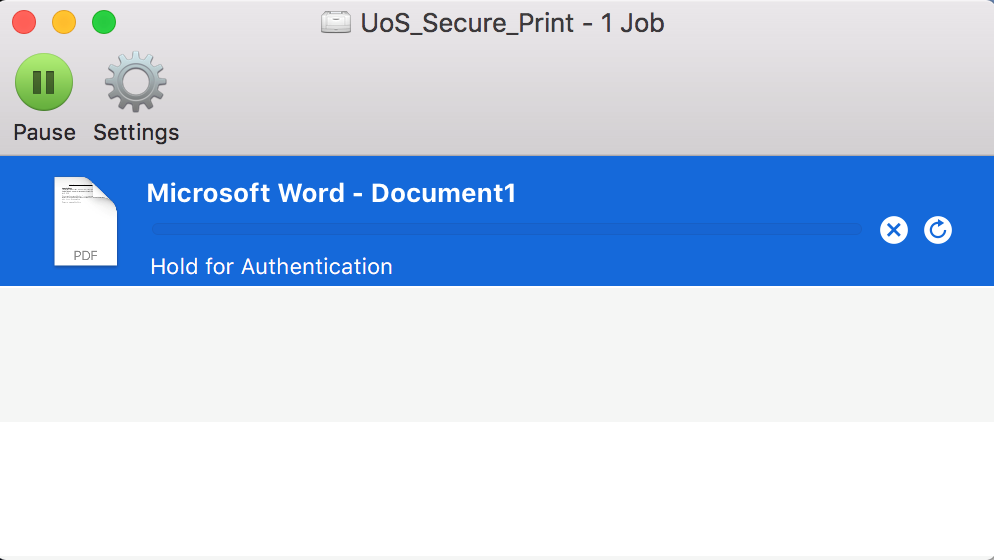
This error (shown above) occurs when the password your computer has saved doesn’t match what your current Goucher password is in the system. This usually happens after changing your Goucher account password. This is how to fix it:
- Open the printer queue window. If you just tried to send the print job, it is likely showing a printer icon on your Dock with a warning symbol on it, which will take you to the queue window.
- If you do not see a printer icon on the Dock, You can also click on the magnifying glass in the top right corner and search for “Printers & Scanners”. The Printers window will appear; double-click the printer on the left-side panel that is throwing the error.
- Next to the print job that’s being held, there are two buttons. One has an X on it, and the other is a circular arrow. Click the circular arrow button.
- A window will pop up asking for your credentials. Make sure your username is in the username field, and re-type in your new Goucher password in the password field.
- Remember to click the check box to save it to your keychain.
- Click OK.
The print job should now properly send. You may have to repeat this for all of the remaining jobs that are being held (or you can cancel them and re-print).
Printer Repeatedly Pausing (Even After Resuming)
This primarily occurs because your computer is connected to GoucherGuest and not GoucherWIFI. Click on the WiFi icon in the top right corner on your screen, and switch your computer to GoucherWIFI.
If the computer still keeps connecting to GoucherGuest, you may need to remove GoucherGuest from your saved networks list. This article details the steps on how to do that: How to remove a saved WiFi network in Mac OS X
If neither of those two fixes resolve the issue, please contact the Help Desk.