On Macs, the default printer setting, or preset, for the Sharp color copiers is set to Automatic for color which causes the printer to think you are printing in color even though the document may be in black and white. Please follow the instructions below to create a preset that will allow you to print in Black & White:
1. Launch Microsoft Word and under the File menu, select Print to bring up the printer settings.
2. Select Copies & Pages to reveal the drop down menu and select Color from the list.
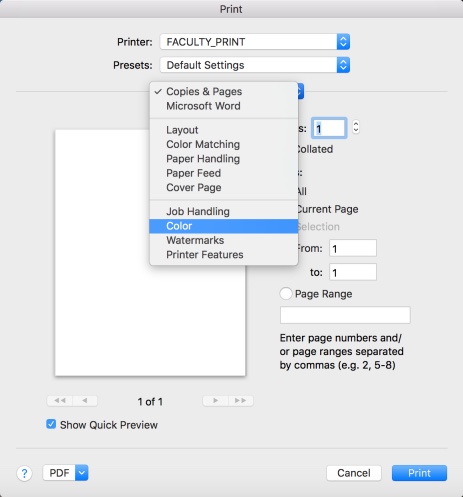
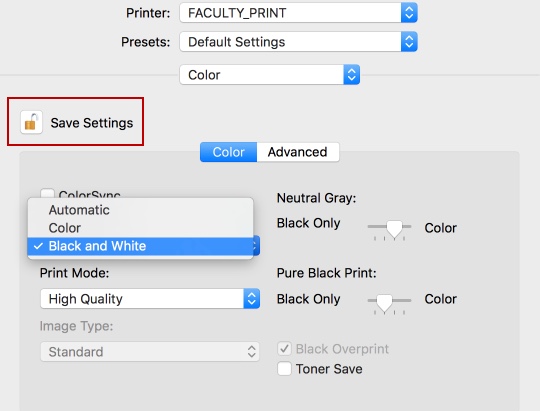
3. Then in the Color Mode field, change the setting to Black and White.
4. Click the lock in the Save Settings
5. Select PRINT.
To print using the new B/W preset:
1. Go to any program and select Print from the File menu
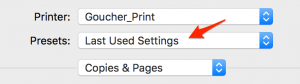
2. Ensure the Presets setting displays “Last Used Settings”
3. Click Print as usual
Your job should then print in black and white. If you want to print in color then continue to use the original Default Settings preset.